WOW so cute omg I’m totally obsessed with this little baby.
This little half frame camera was made by Ricoh in japan but marketed by ansco/GAF in the early 60’s in the US. Ricoh made a bunch of versions of these, some have self timers, there’s one with a CDS meter and a f/1.7 lens. Most versions have a fixed focus f/2.8 lens, but this one (and its corresponding Ricoh-branded edition) have a nice zone focus with an indicator in the viewfinder. All of these have a really rad spring-wound automatic advance that sounds like an insane wind up toy and makes me feel like a fancy 1960’s fashion photographer because you can shoot pretty fast and I want to make my subject POSE! “MORE! MORE! YOU’RE AN ANIMAL! SHOW ME FIERCE!”. Like any half frame, you get double your pleasure, err, frames from a roll. The spring winder on mine will advance about 23-26 frames before needing to be rewound, although it starts to slow down around frame 20. My first roll of pics were decently well exposed and reasonably sharp (at least as sharp as my crappy DSLR scanning rig can capture).
A note about the spring winder, there’s a little sprocket inside that engages the film. This sprocket cocks the shutter and also stops the spring winder once the film has advanced. That said, if you shoot the shutter without any film in the camera, the winder will go and go until the spring runs out and the shutter will not cock. If you’re just testing things, stick a piece film in there or just roll the sprocket with your finger to reset the shutter.
It’s TINY, smaller than an olympus pen and so so cute. I got mine for $20 bux including shipping from ebay untested. Looked kinda grimy but actually in pretty decent shape. Viewfinder pretty hazy when it arrived but otherwise in good shape.
Vitals:
- 28mm f/2.8 lens
- Exposure: Automatic Aperture (f/2.8 - f/22) set by selenium meter. Metering from 12-200 ISO. Manually setting the aperture switches the shutter 1/30 (it’s intended for flash). You could probably adjust the meter to handle up to ISO 400 film, the aperture does go down to f/22 so you could probabaly get away with it.
- Shutter speeds 1/125 and 1/30 (no B, many of the other ricoh models have a shutter release threaded for a cable release, but this one does not, so wouldn’t be very useful anyways). 1/125 is used in auto mode, 1/30 manual/flash mode.
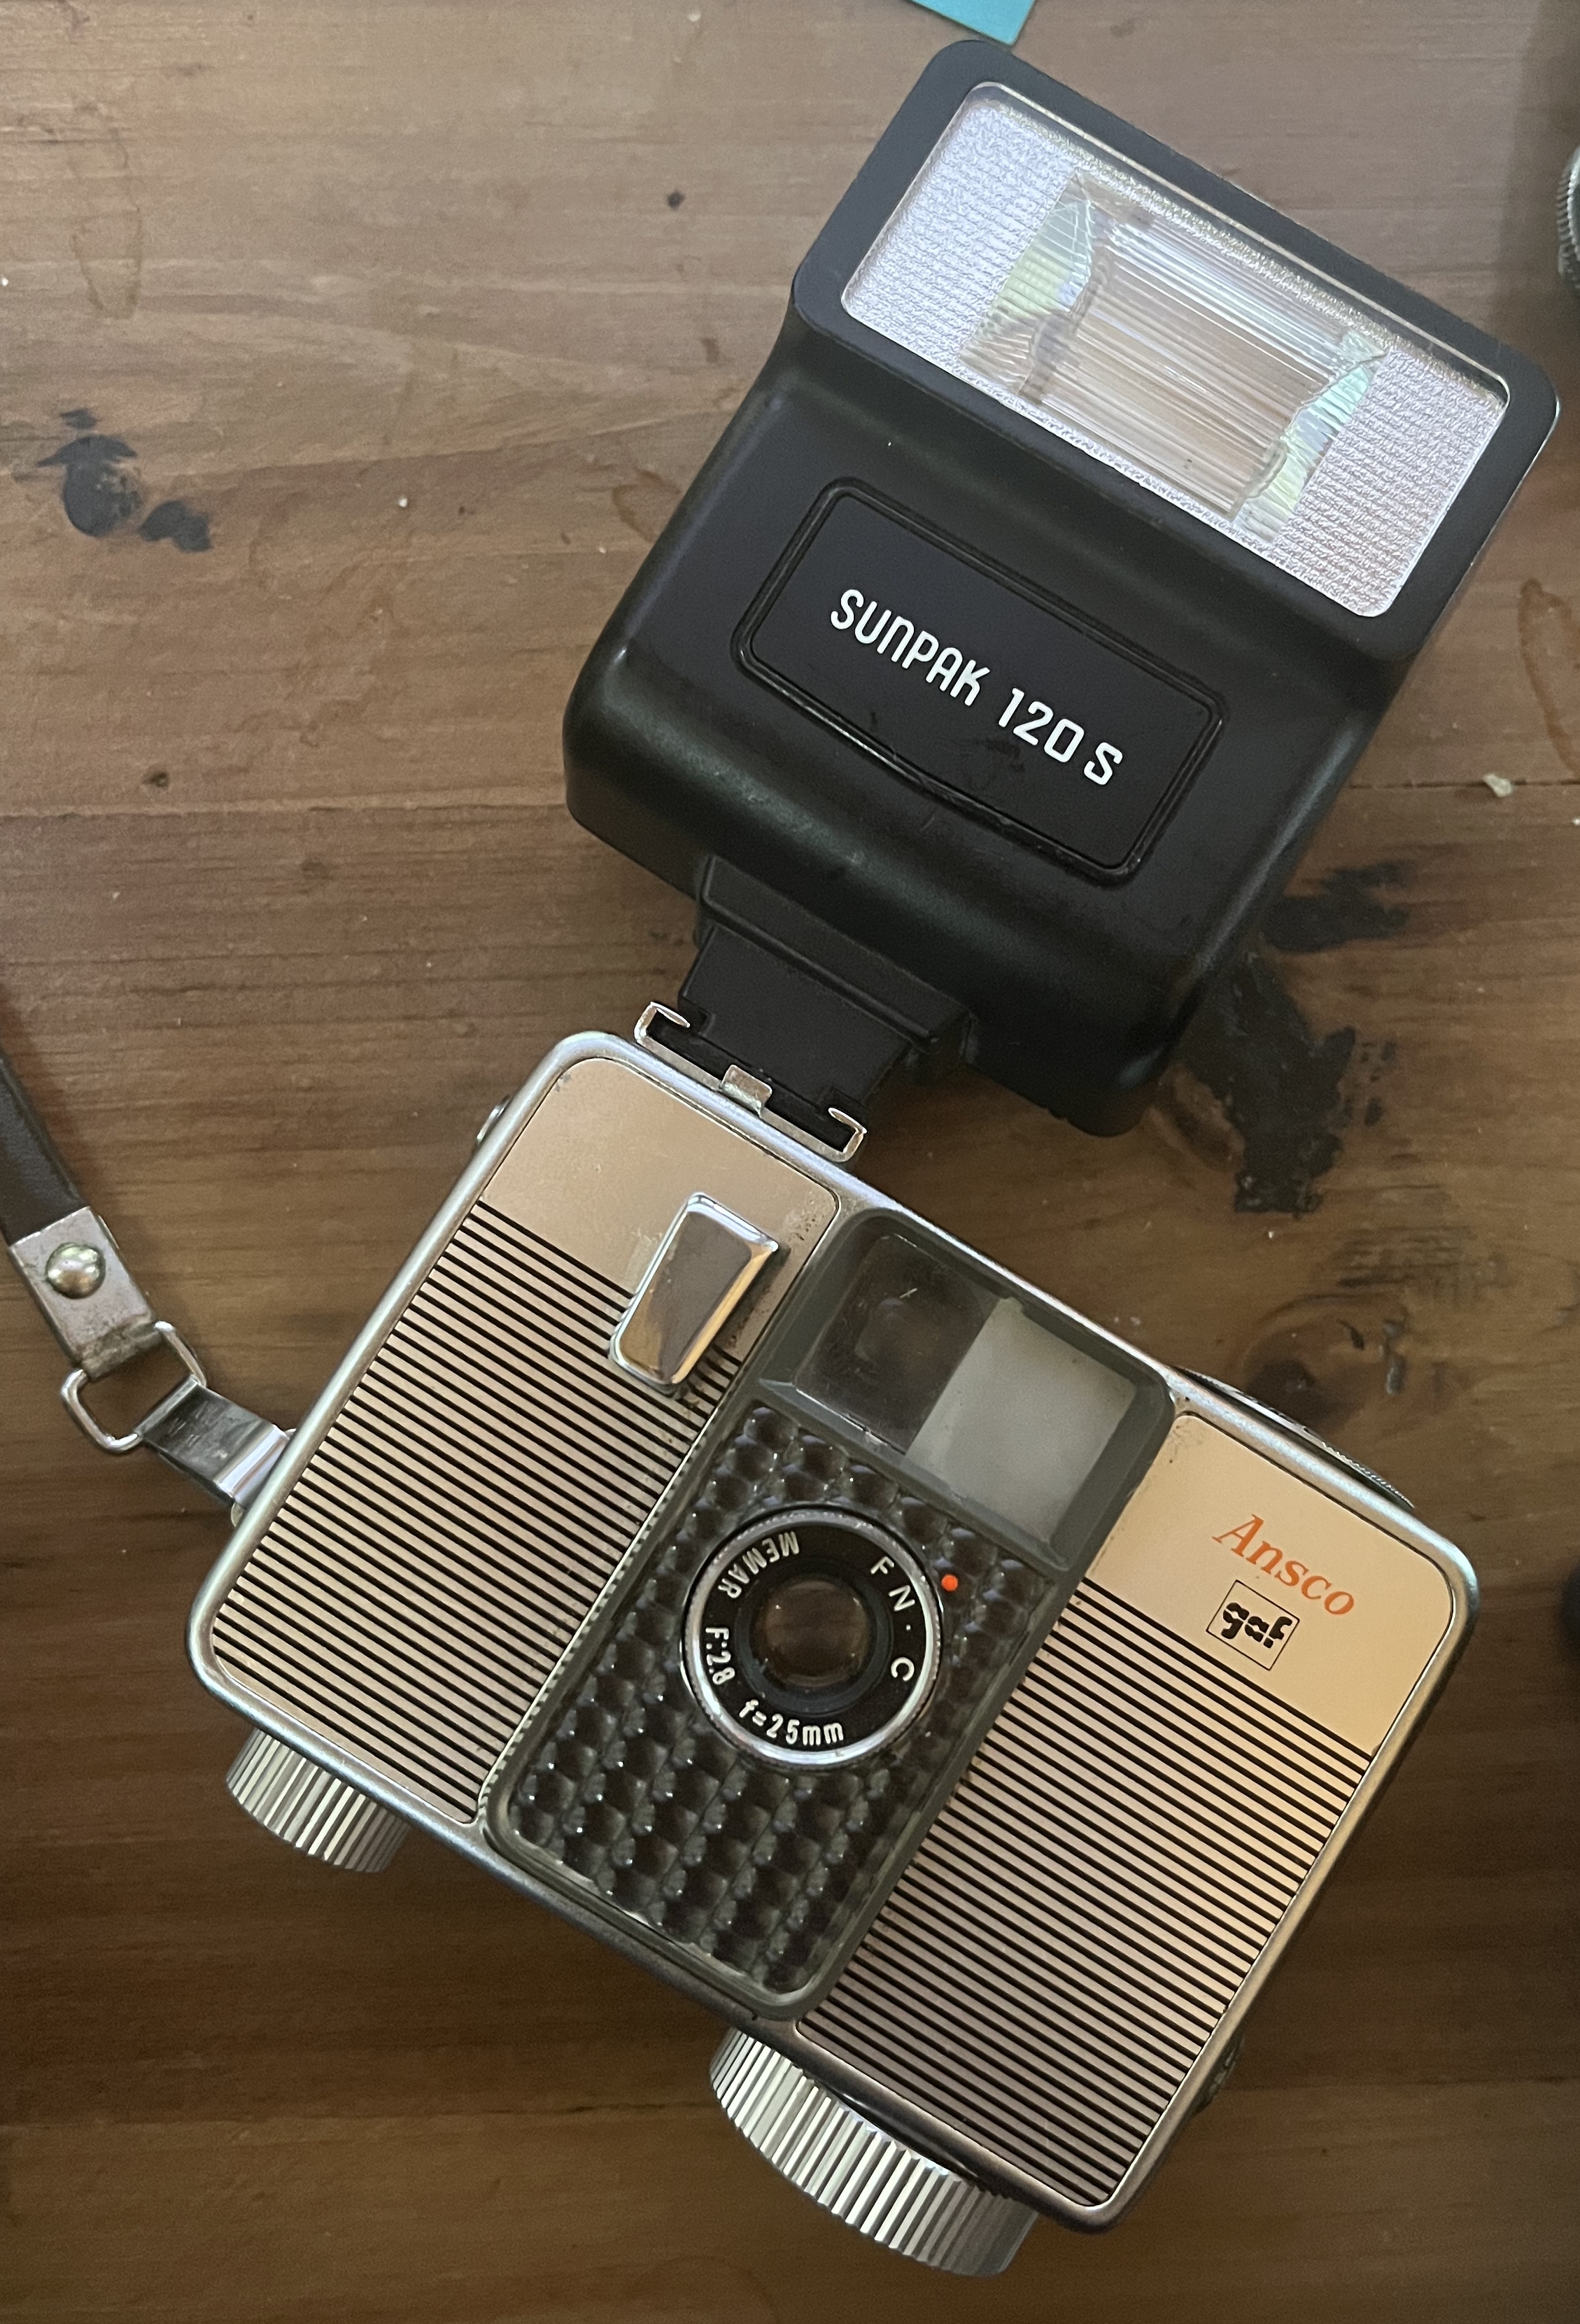
- Flash: Aperture dial has markings on it that correspond to flash numbers and zone focusing zones to help you quickly dial in the right aperture for manual flashes. Automatic flash just pick the appropriate aperture and fire away. Mine came with a little AG-1B flashbulb unit (and is pictured with a different flashbulb unit in the manual), but appears to sync with electronic strobes just fine. Cold shoe on top with a PC port on the side.
- Disassembly note: if you’re taking the front cover off, you need to remove the two rear screws on the cold shoe, but leave the front screw in place, it’s just screwed into a little brass nut and isn’t holding the cover to the body at all.
- Viewfinder: Kinda small but not awful viewfinder with projected bright frameline and a little indicator for the selected focusing zone. Also includes a little gold oval in the lower left corner to indicate whether or not you have enough light to be shooting without a flash. If you can see the indicator, you’re good, if you can’t you must flash your subjects. Hope you wore your trenchcoat. No parralax markings but the viewfinder is pretty much right on top of the lens so you can probably fudge it pretty accurately. Plus honestly who cares.
- Dimensions: 92mm * 74mm * 38mm
- Manual from Butkus
Repairs:
When I got the camera it was basically working, but the viewfinder was quite hazy and the meter seemed about was off by a stop, possibly due to the declining health of the selenium cell. There’s no indicator for what stop is being selected by the meter, but you can look into the lens while snapping the shutter to see how far the aperture is closing down and compare it to manually-selected aperture settings (which are available for flash).
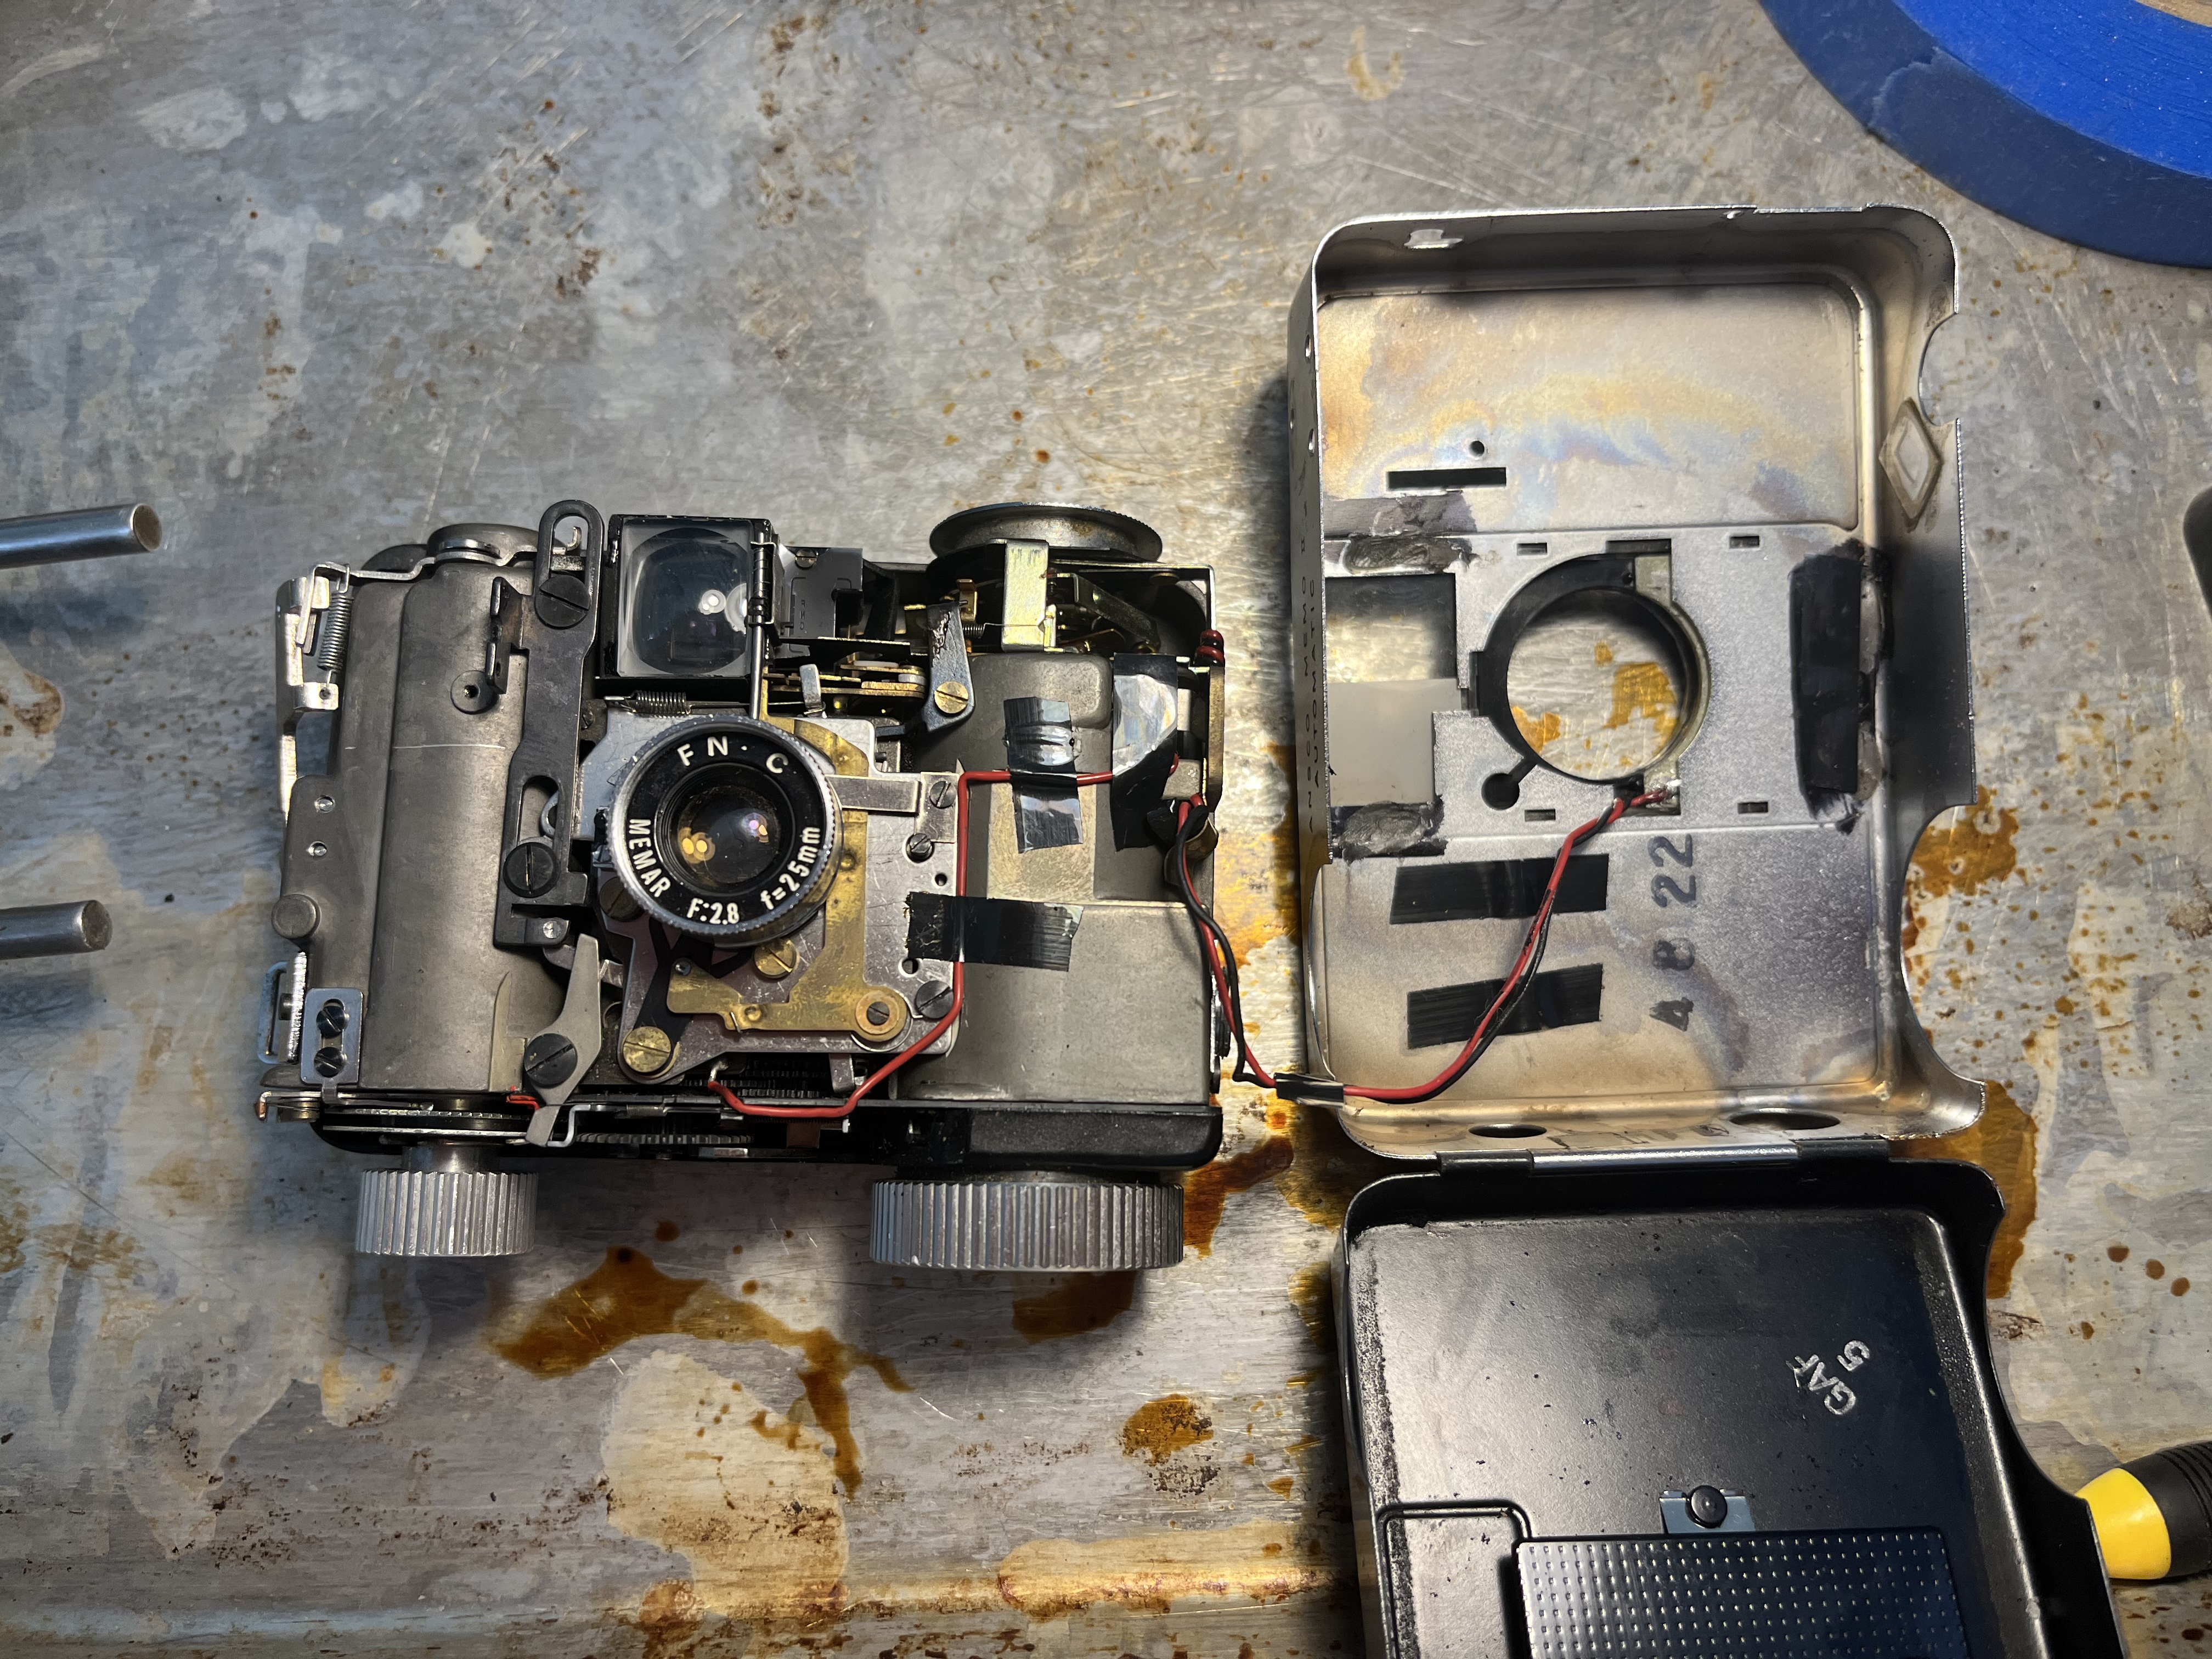
First things first, pop the cover off. There’s some obvious screws, and you also need to unscrew the tripod and PC socket. Only the two rear screws on the cold shoe need to be removed.
Notice that the selenium cell is not really accessible, if it were, I might have taken the opportunity to replace it with silicon. The plastic bit holding on the selenium cell appears to have tabs which protrude through the front cover and are then melted in place. you might be able to get away with re-melting the tabs, but I imagine your best bet would be to 3d print a new front bezel thingey which I really did not want to do for this project.
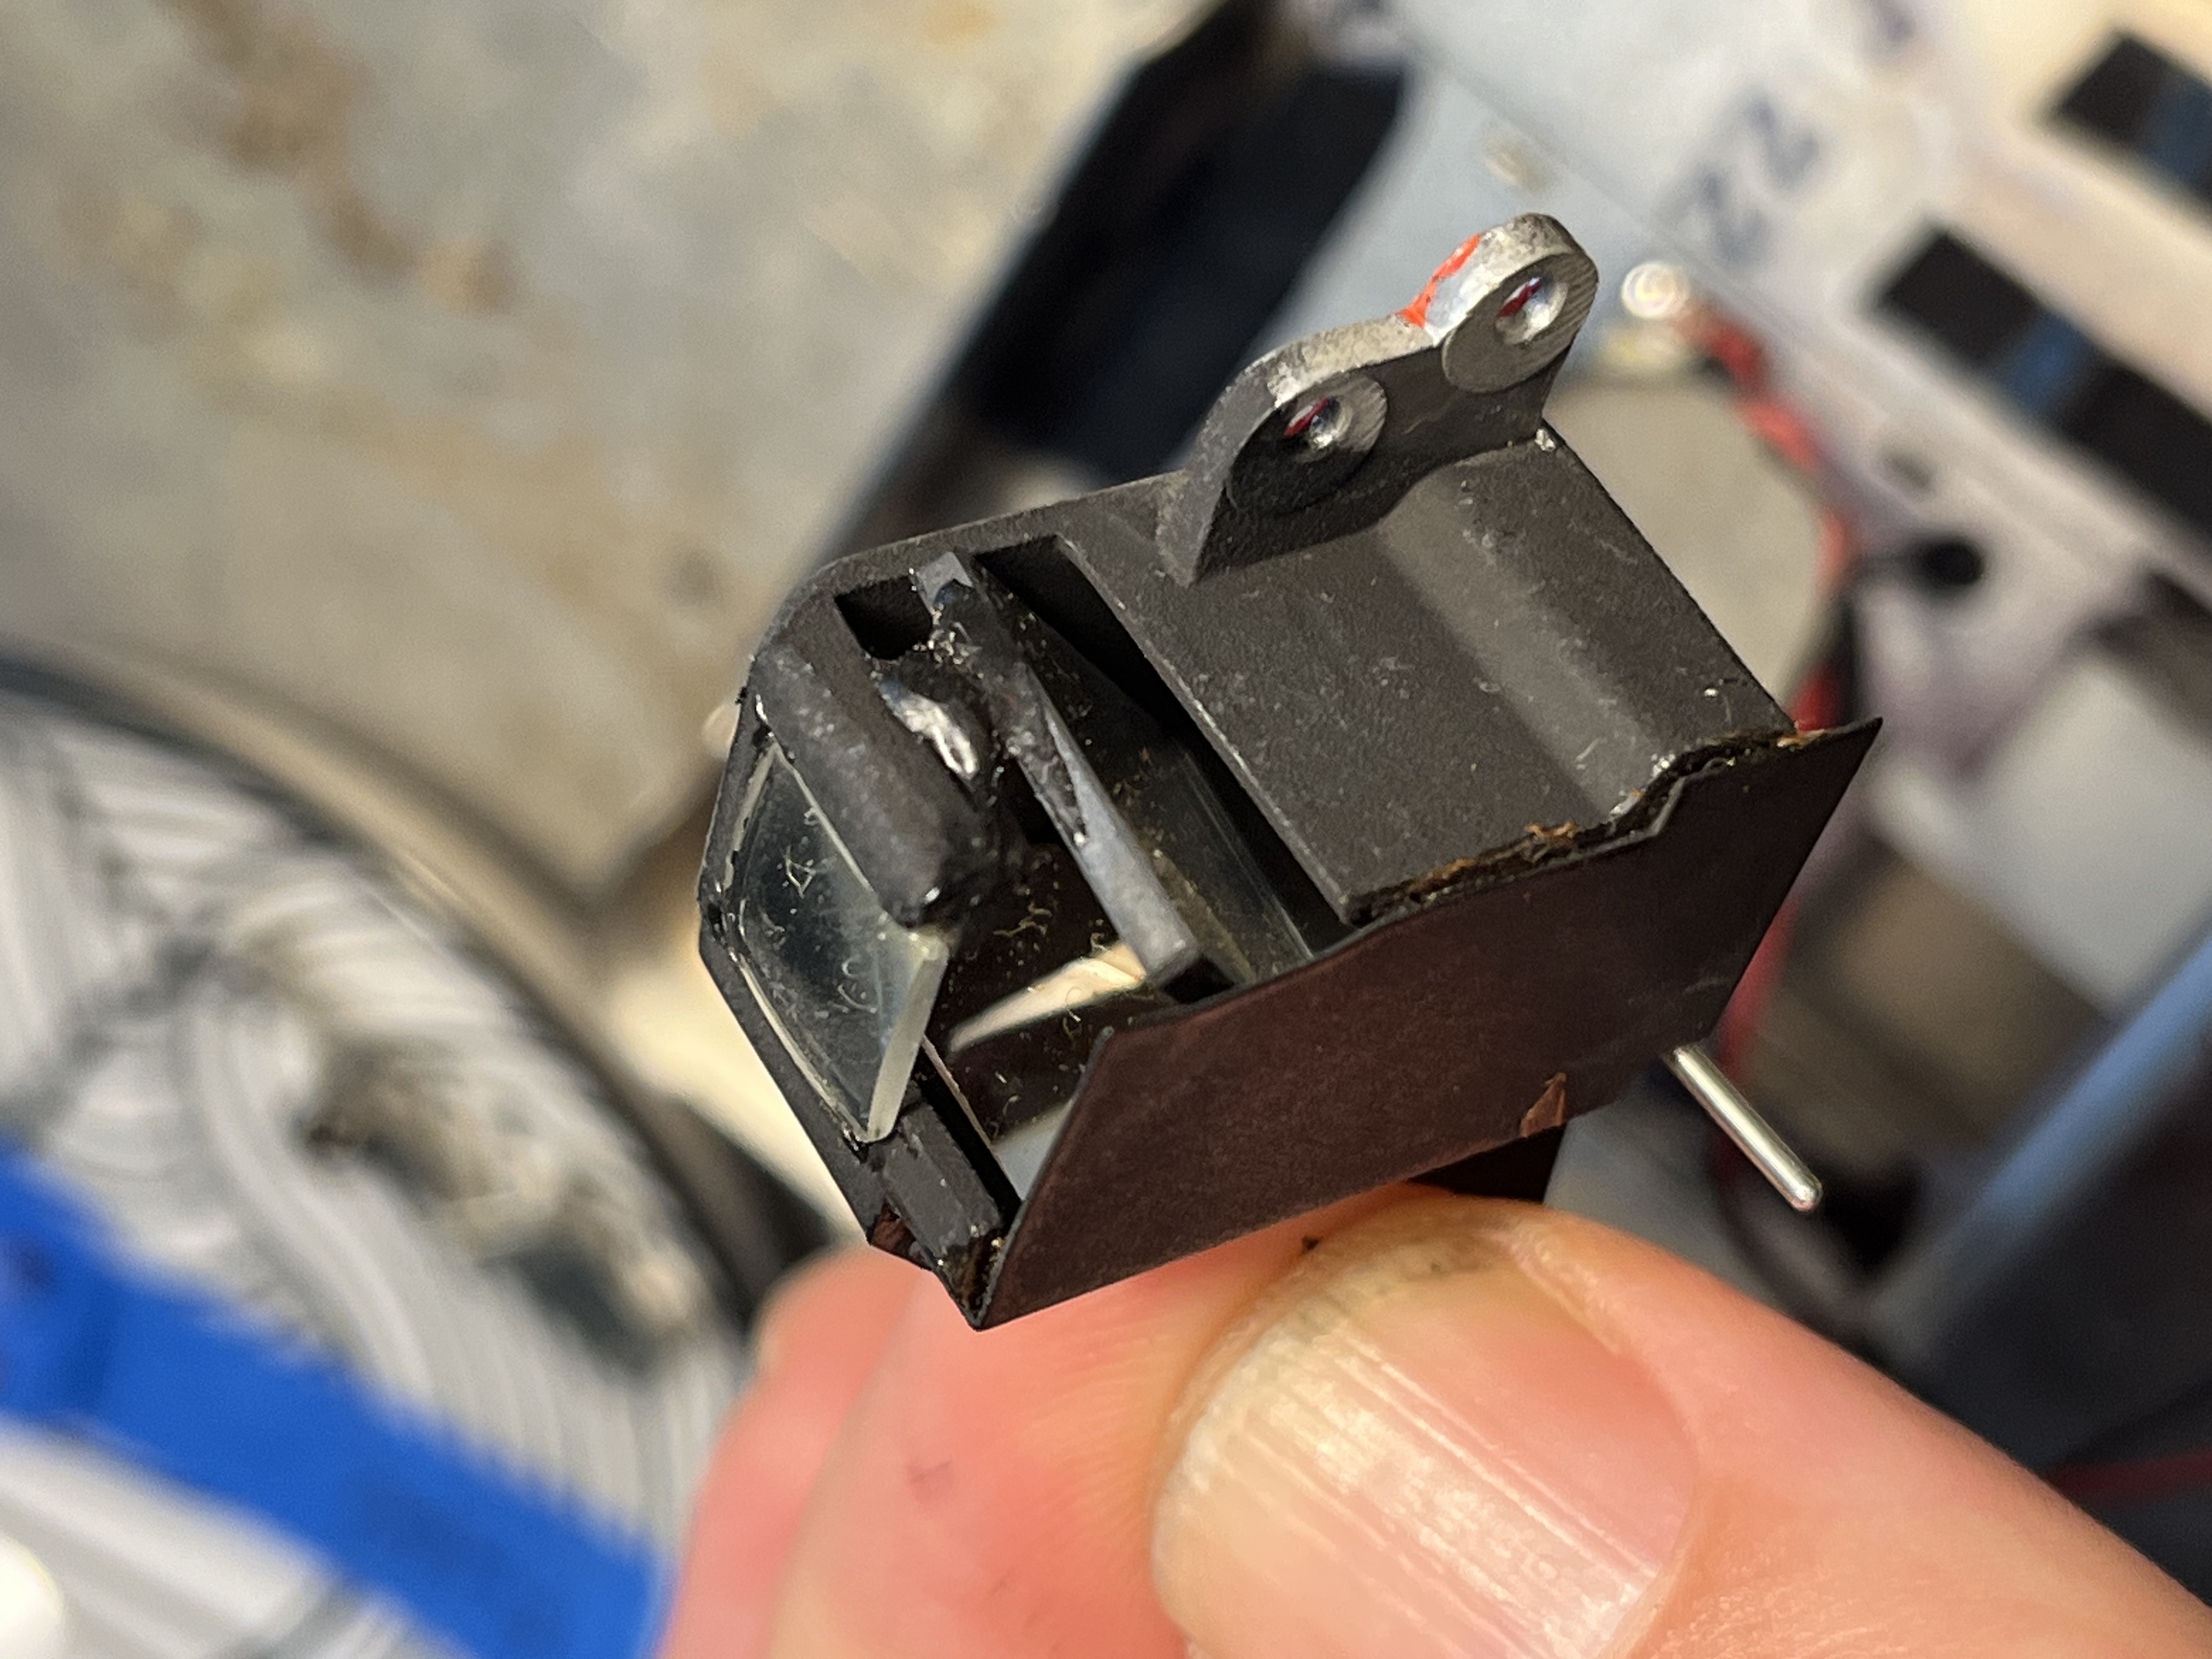
This camera uses a captured-needle type automatic mechanism where the selenium cell wiggles a little galvanometer, and the shutter button clamps the meter needle in place when shooting and closes down the aperture an amount based on the position of the needle.
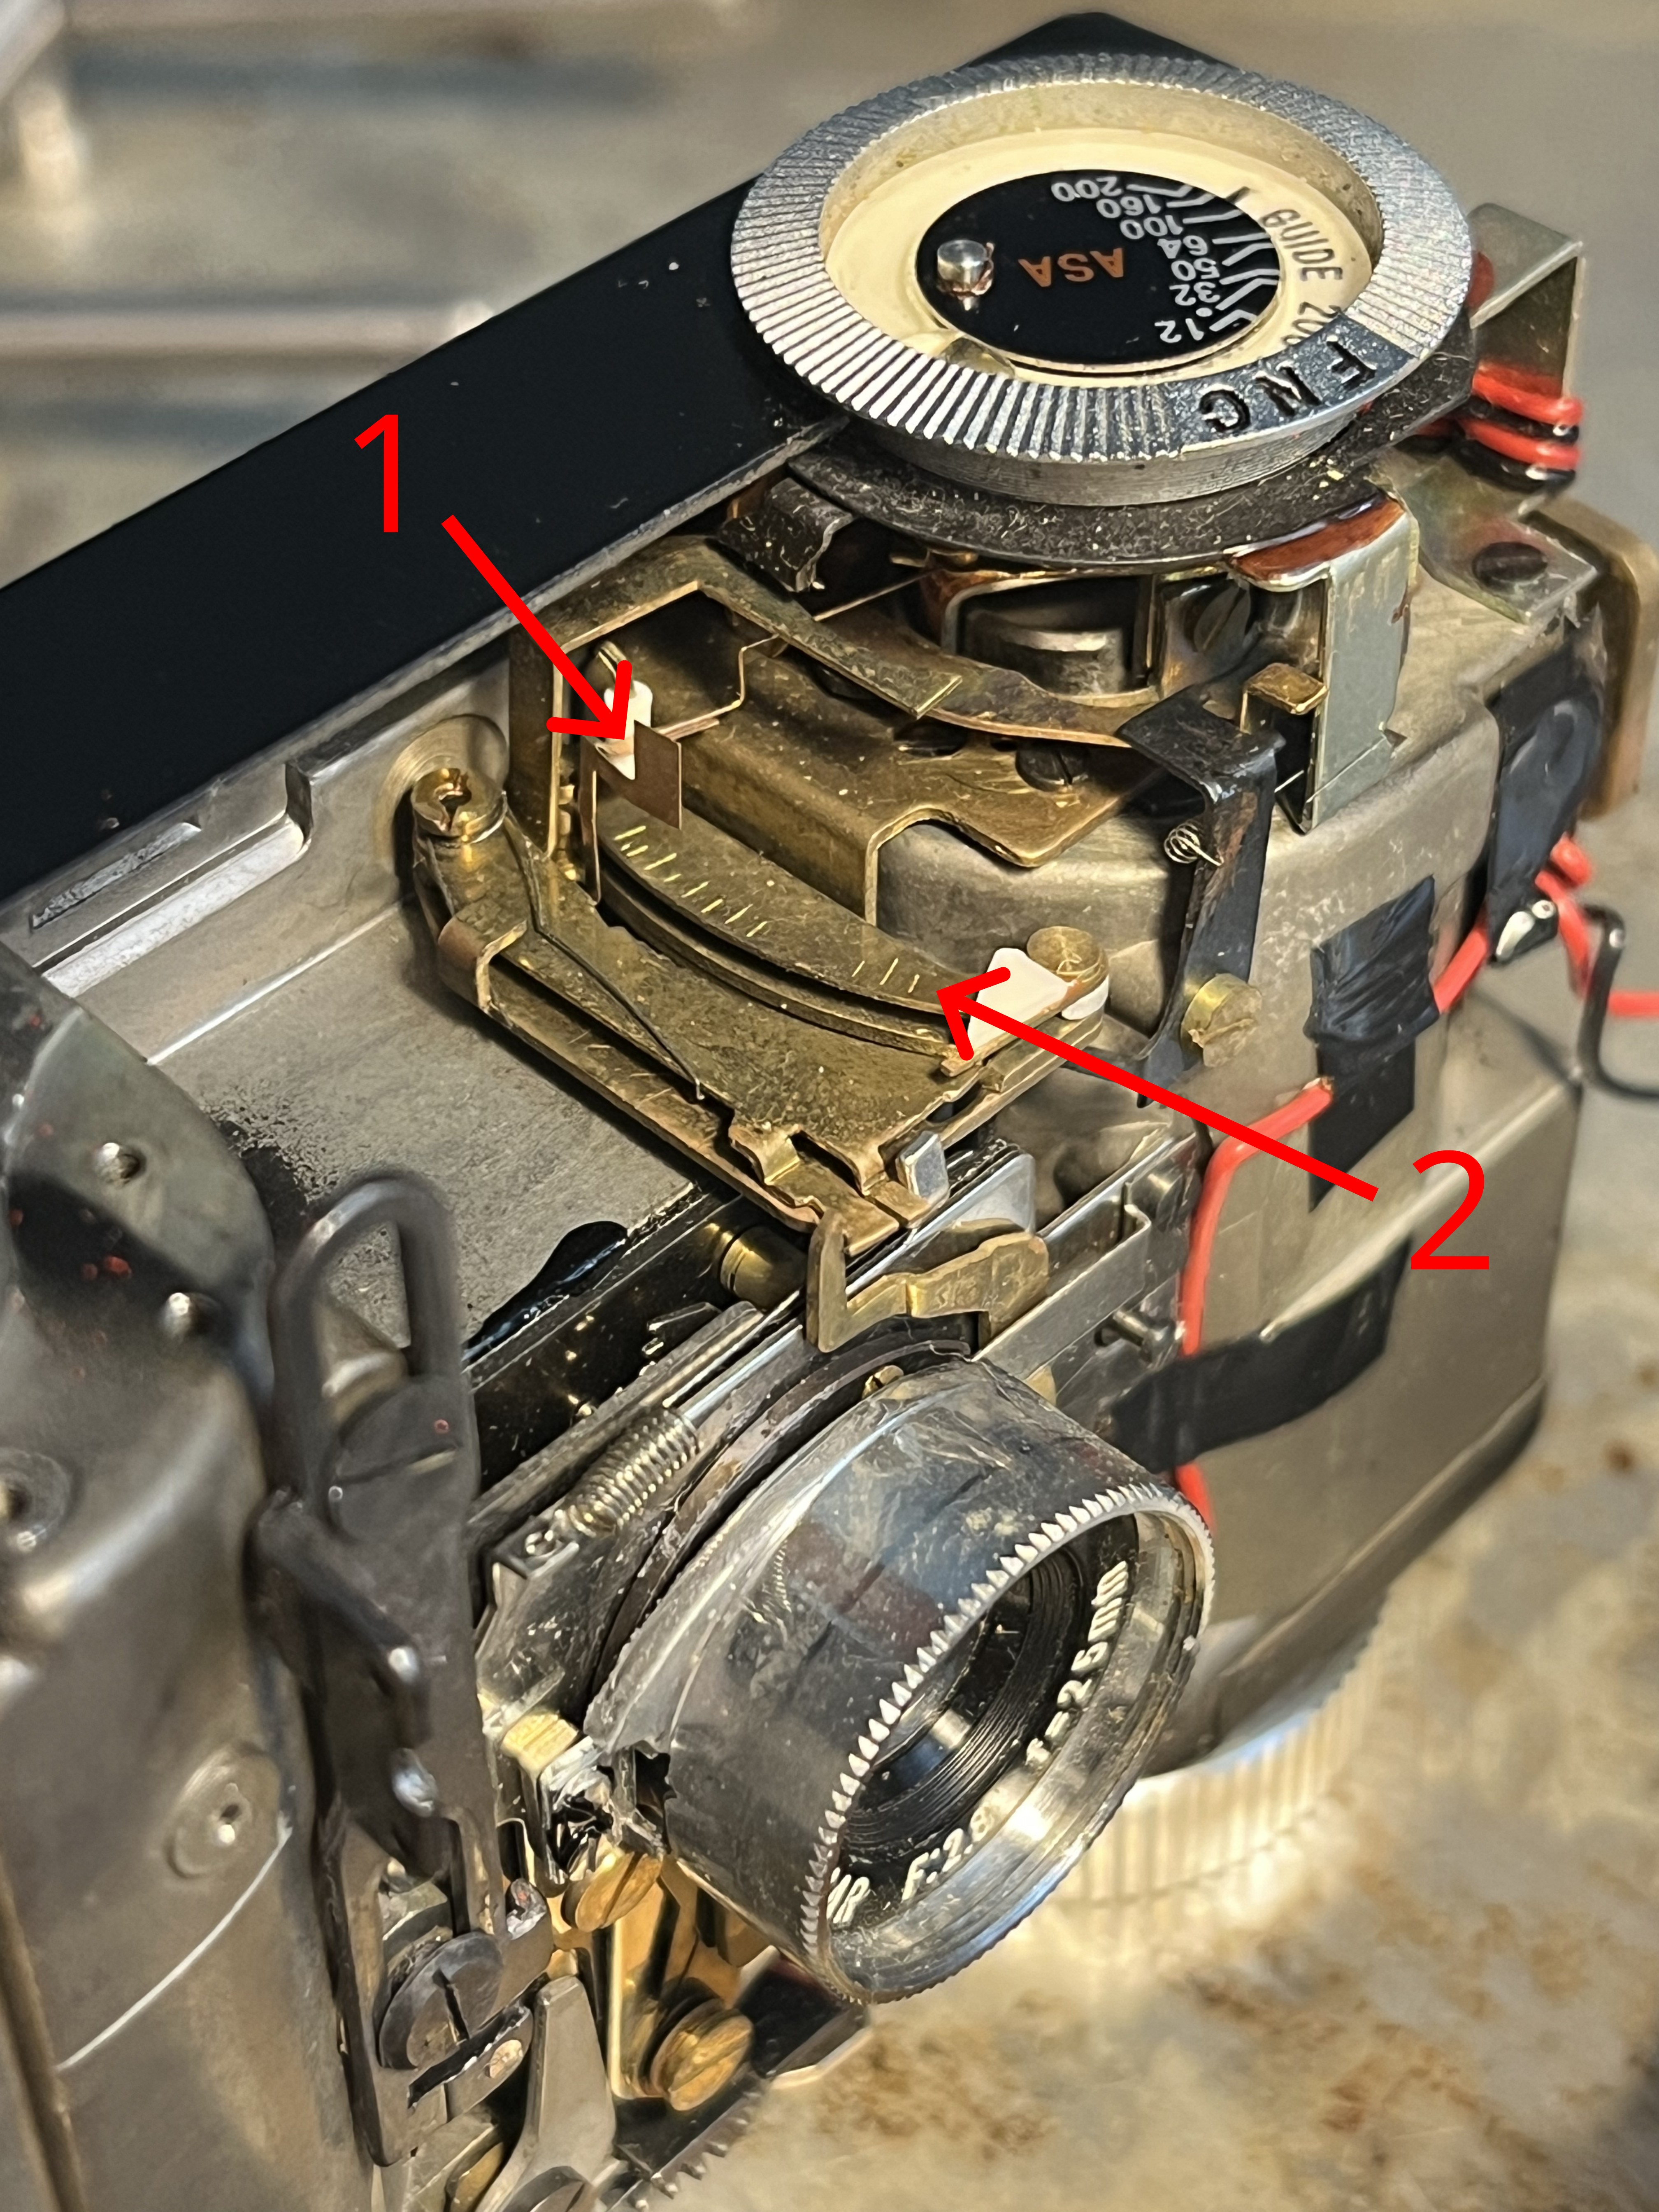
- This funky flag on the meter needle blocks a tiny reflector in the viewfinder assembly which is what makes the “gold dot” mentioned by the manual disappear when there’s not enough light (meter is currently sitting in the low light position in this photo because the cell is pointed at my workbench)
- There are some little markings on the meter which might correspond to aperture values (which would be handy for calibration) but it wasn’t obvious to me if that’s the case or which markings corresponded to which apertures so I didn’t end up using them.
Lil video that kinda shows the meter capturing action when the shutter is pressed.

Underside of the camera showing the film counter and winding mechanisms.
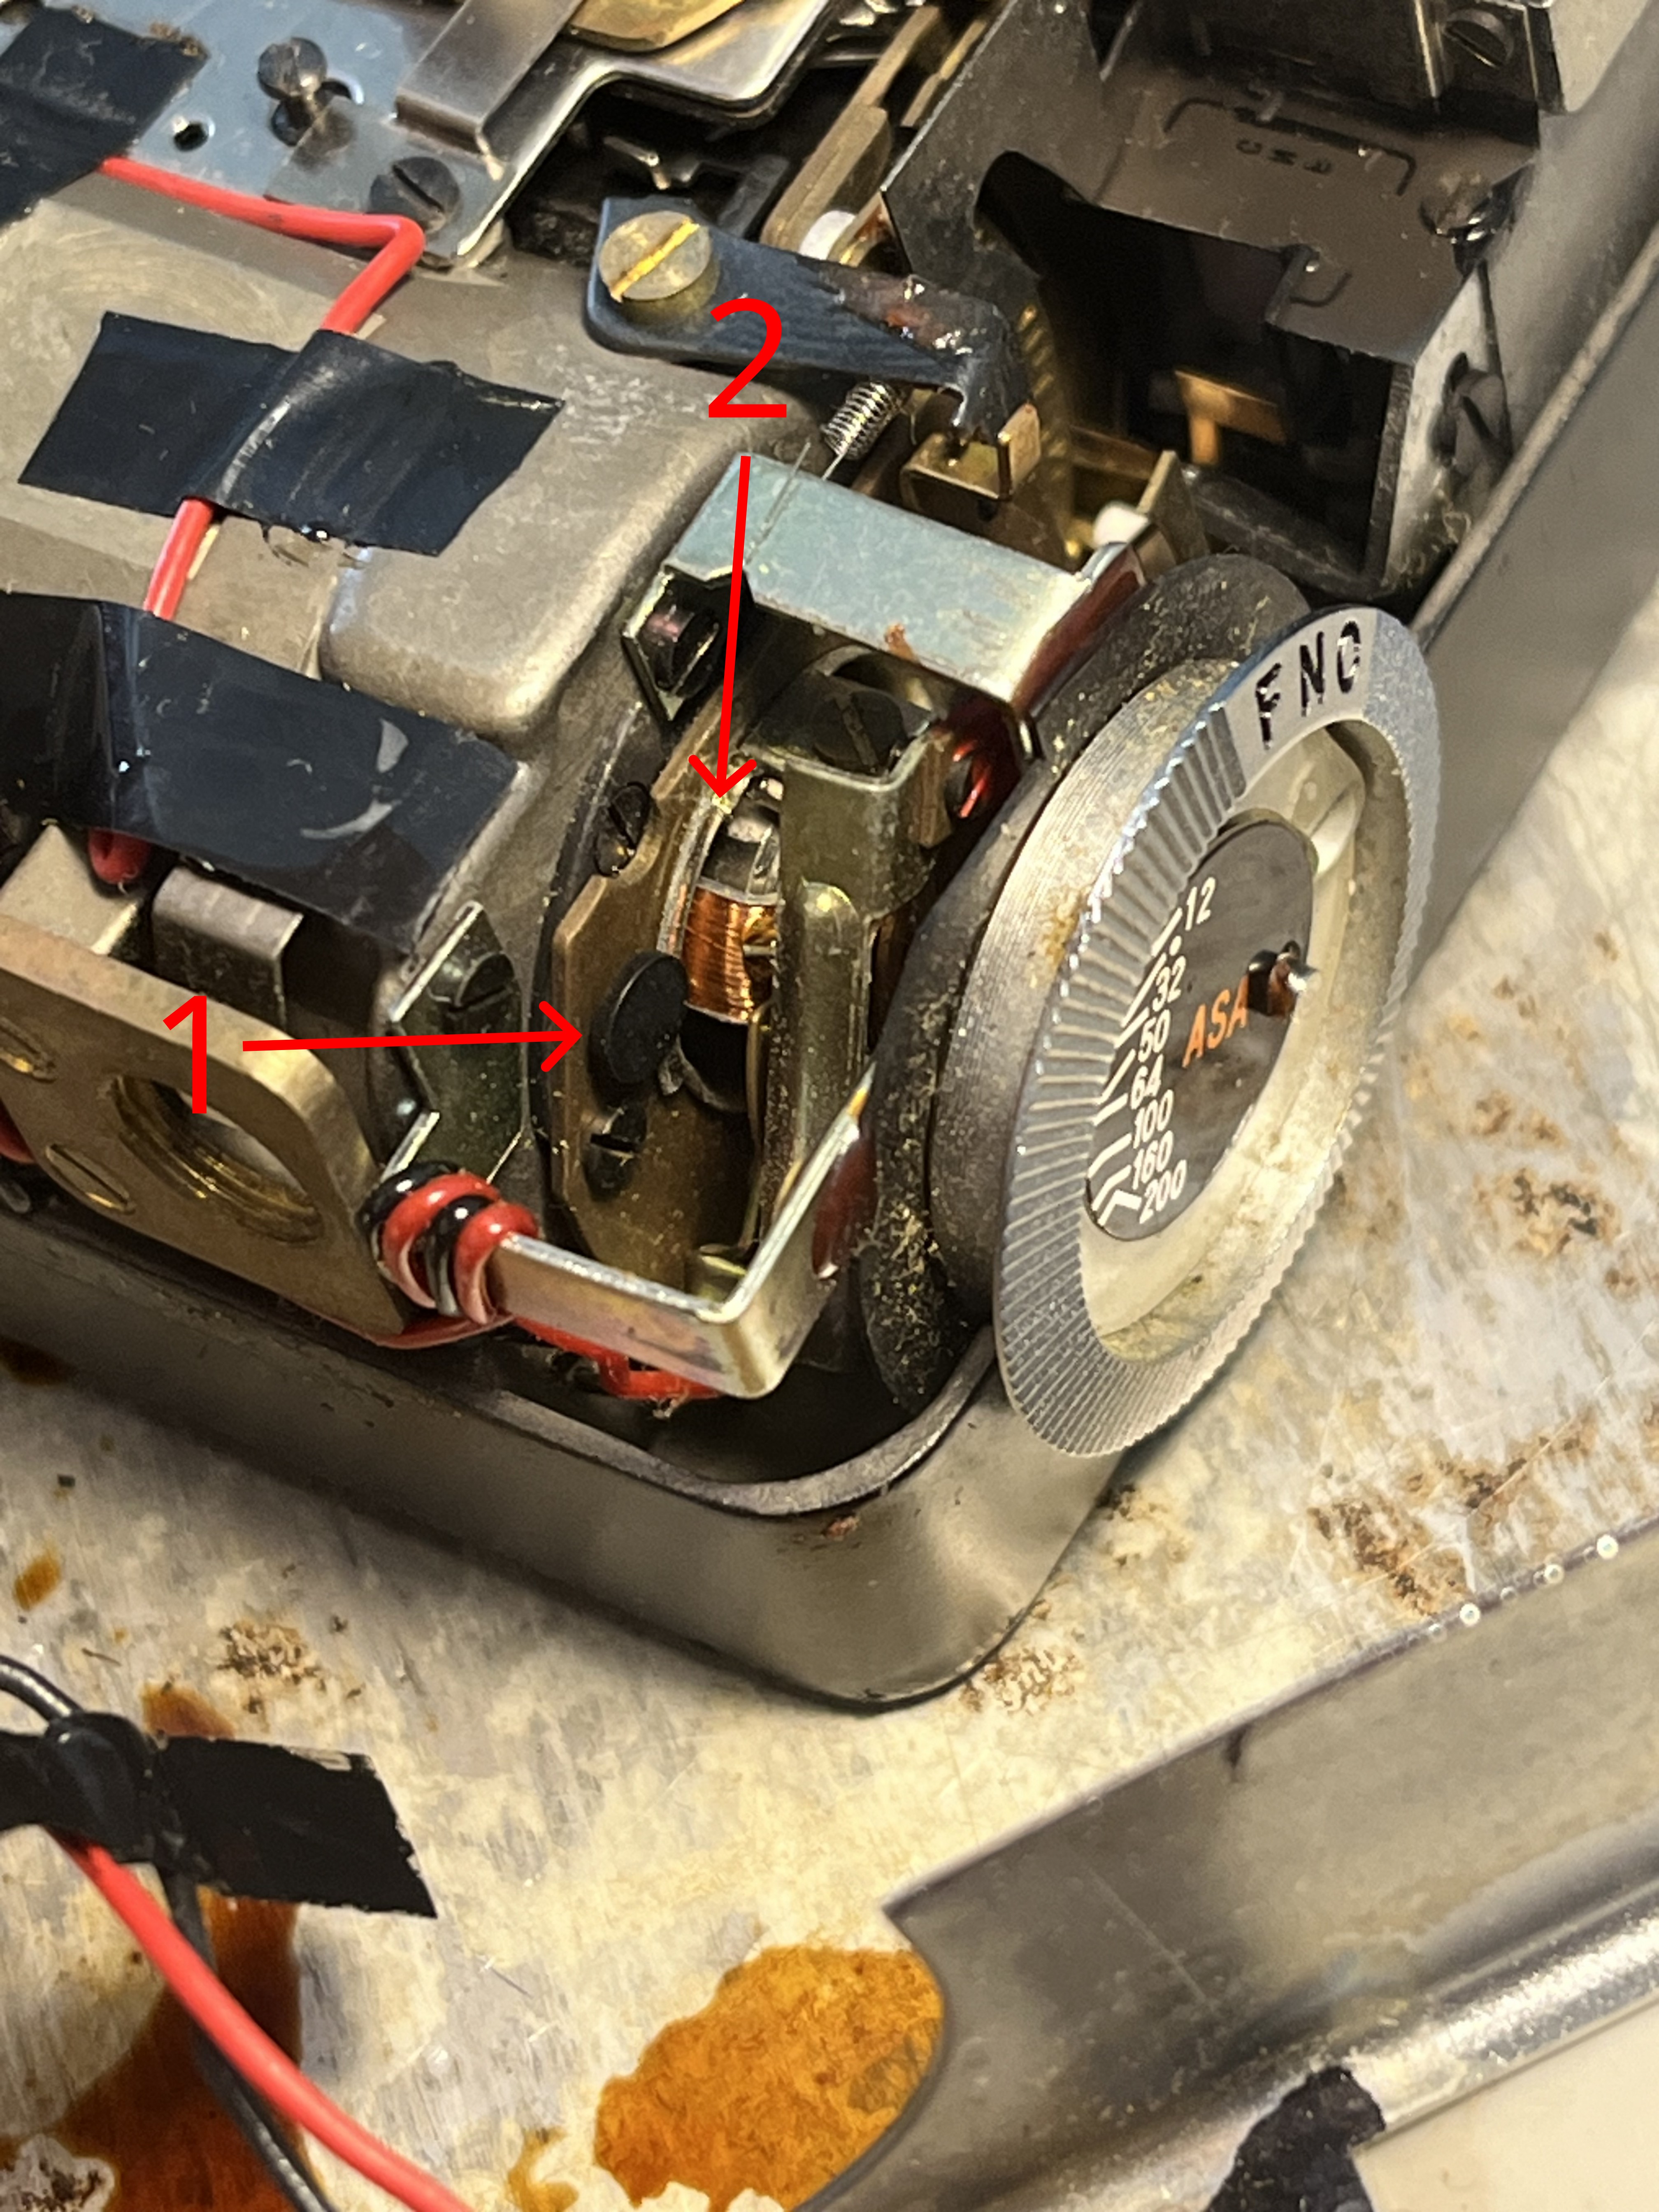
I’m just guessing here if this is the “right” thing to do, but it seems to have worked fine. The meter movement is round and appear to be held in place by some kind of spring pin or rivet (#1), I used a small flat screwdriver to (CAREFULLY) press against a notch on the meter movement casing (#2) to rotate the entire movement counterclockwise (looking down on the dop of the camera) just a scoch. You might destroy the meter if your screwdrive slips into the coil on the meter so watch out.
My initial guess was that the meter was overexposing 1 stop, so I guesstimated that I needed to rotate the meter about 1/7th of the total free swing of the needle (assuming 6 stops f/2.8 - f/22 plus an extra stop for the “not enough light” position). Based on post-adjustment observations and the first developed roll, I think the meter might still be underexposing a bit, but it’s hard to say (mostly it just seems not that accurate but good enough).
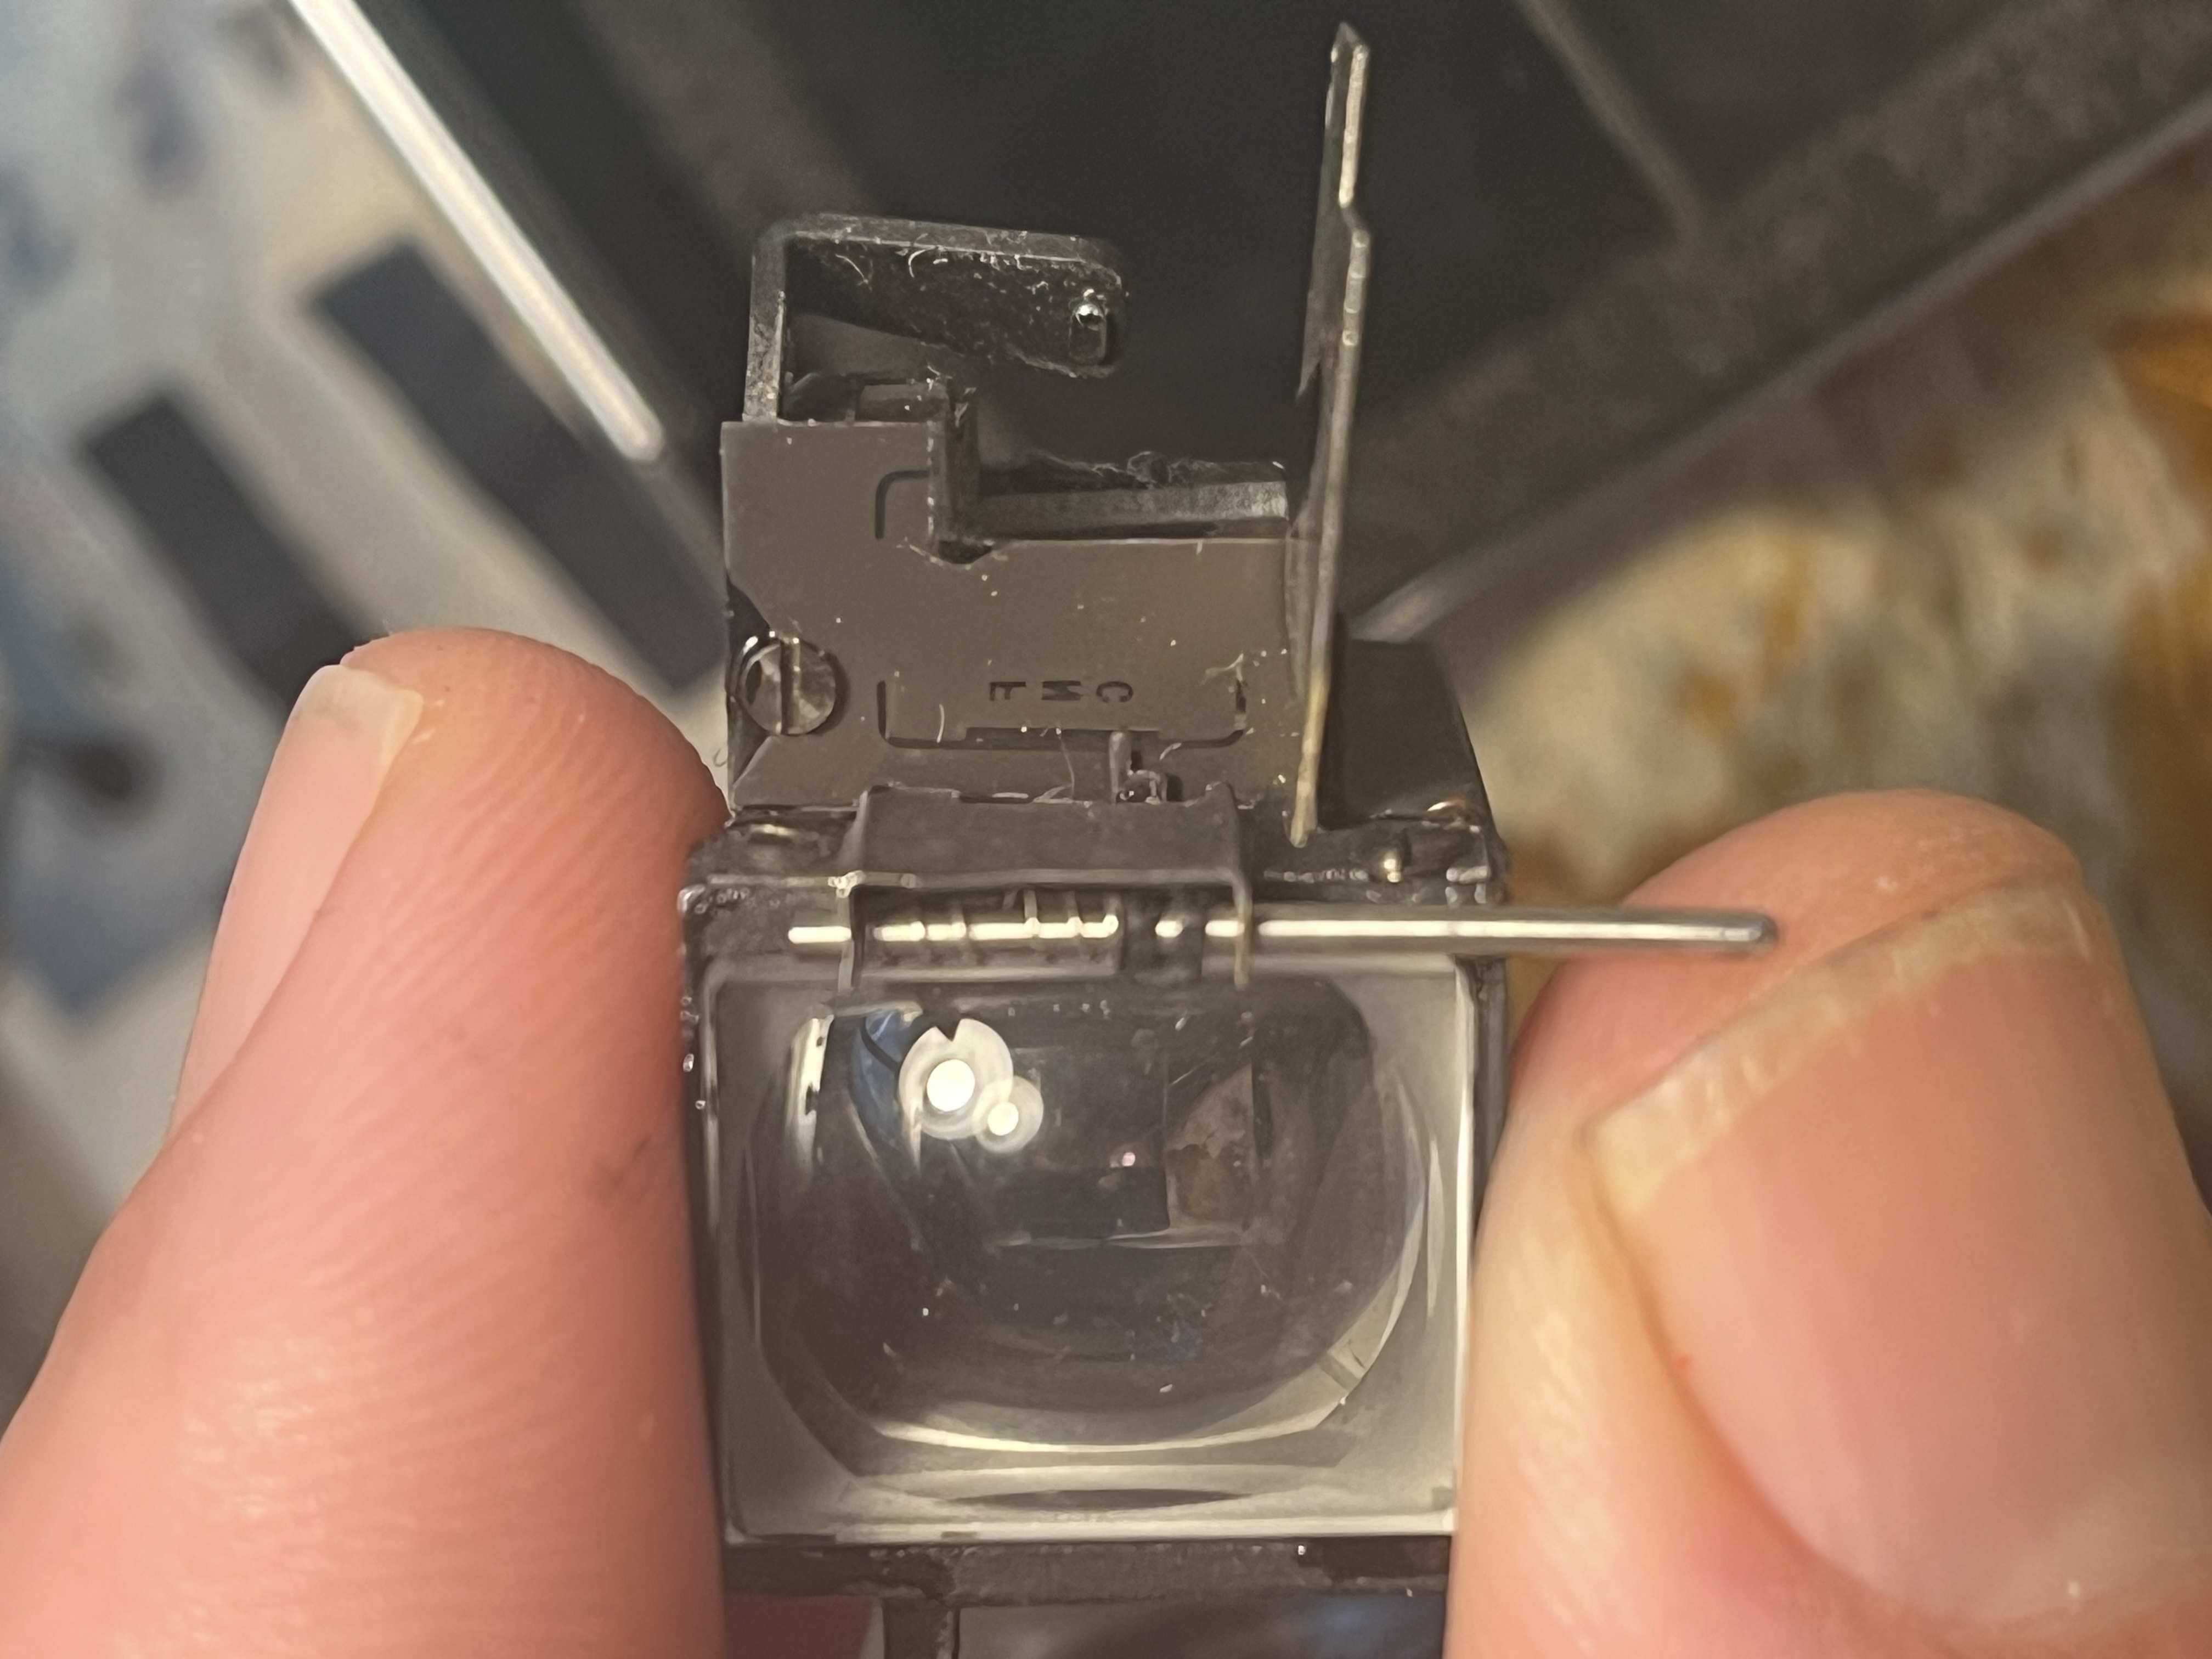
The viewfinder assembly removed for cleaning. You can see the frameline mask with the “F N C” zone focus indicators cut into it. The little spring-loaded steel pin controls a small needle that indicates where the lens is focused to. On the far right side of the assembly you can see a small shiny oval on the inside of the overhanging arm, this is the “gold dot” mentioned by the manual (the underexposure warning indicator) The large flag on the meter needle will block this small reflector when there isn’t enough light for an exposure.
The viewfinder assembly doesn’t really come apart to allow access for cleaning, but I was pretty successful wrapping a small piece of lens cleaning tissue around a toothpick and sliding it it to clean the inside of the objective and eyepiece lenses. Just be careful, you generally don’t want to touch the reflective side of the beamsplitter (the piece mounted diagonally in the middle) because the coating is super thin and can come off easily. The reflective side is facing the eyepiece. There’s another small lens on the side of the assembly to focus the framelines and gold dot onto the beamsplitter that can be cleaned as well. Take similar care with the first surface mirror behind the framelines while cleaning this lens.
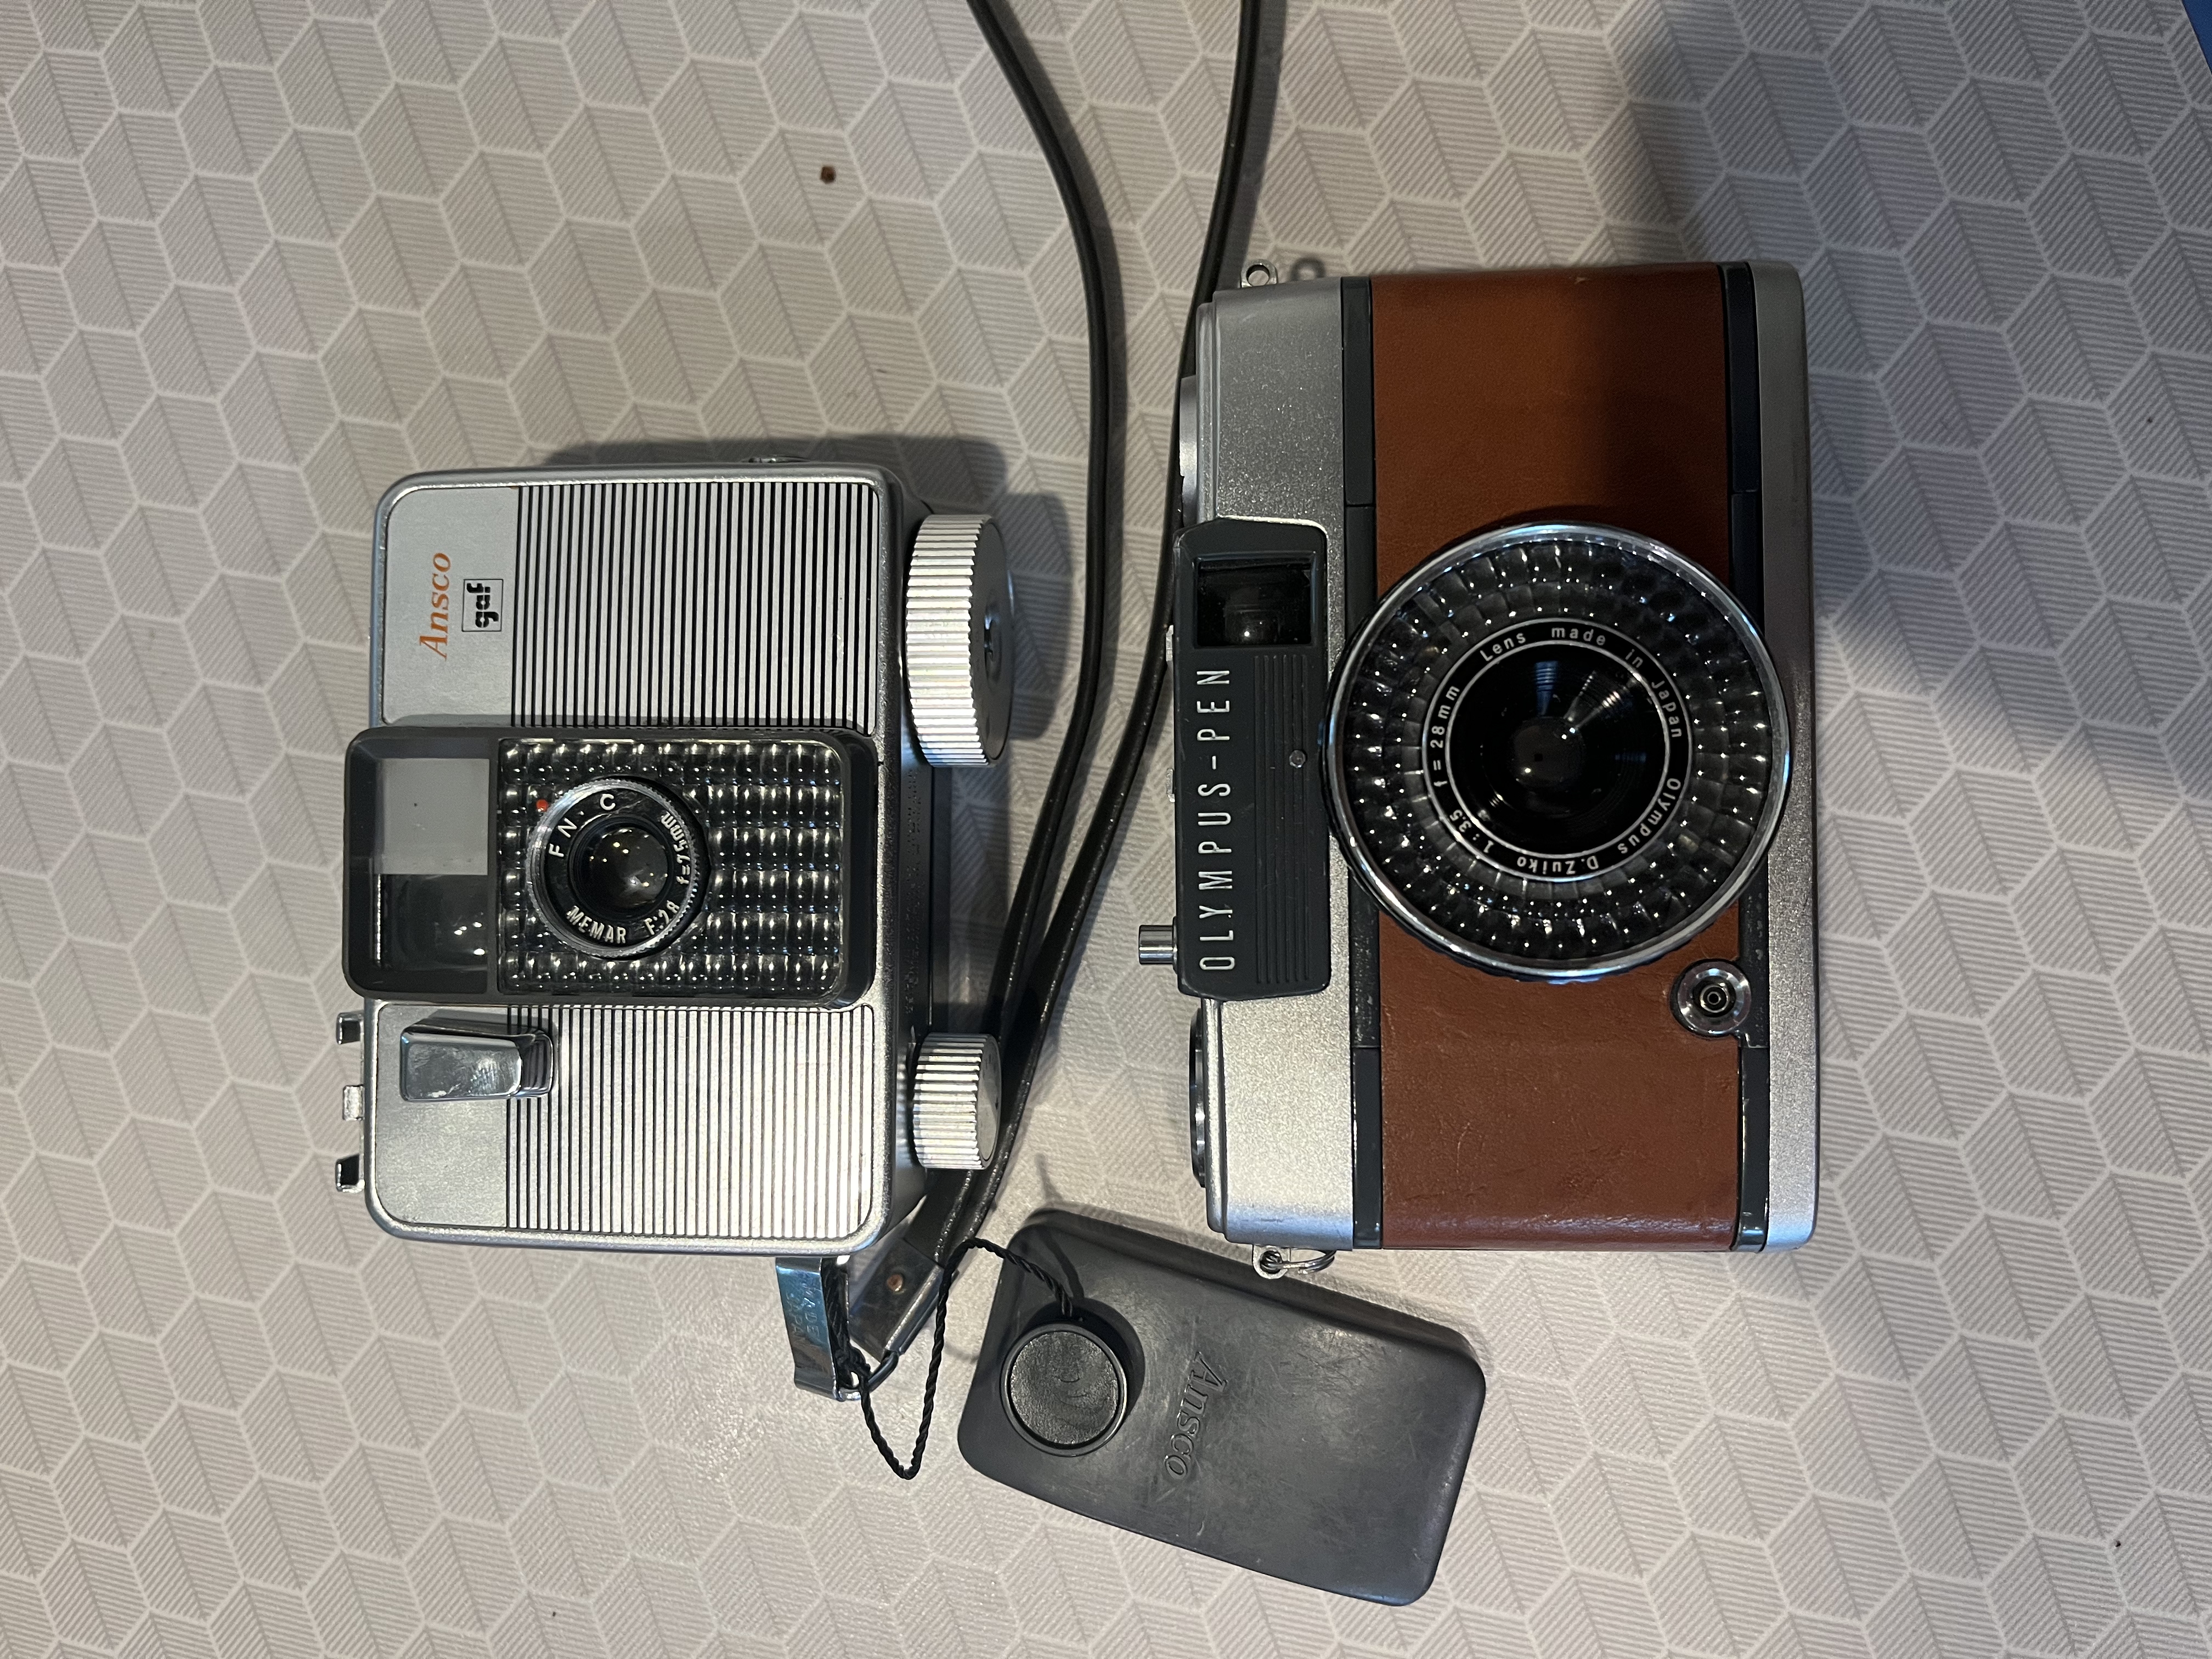
So teeny! Shown next to my friend’s olympus pen ee-2, the ansco/ricoh is real teeny, even including the spring motor!
