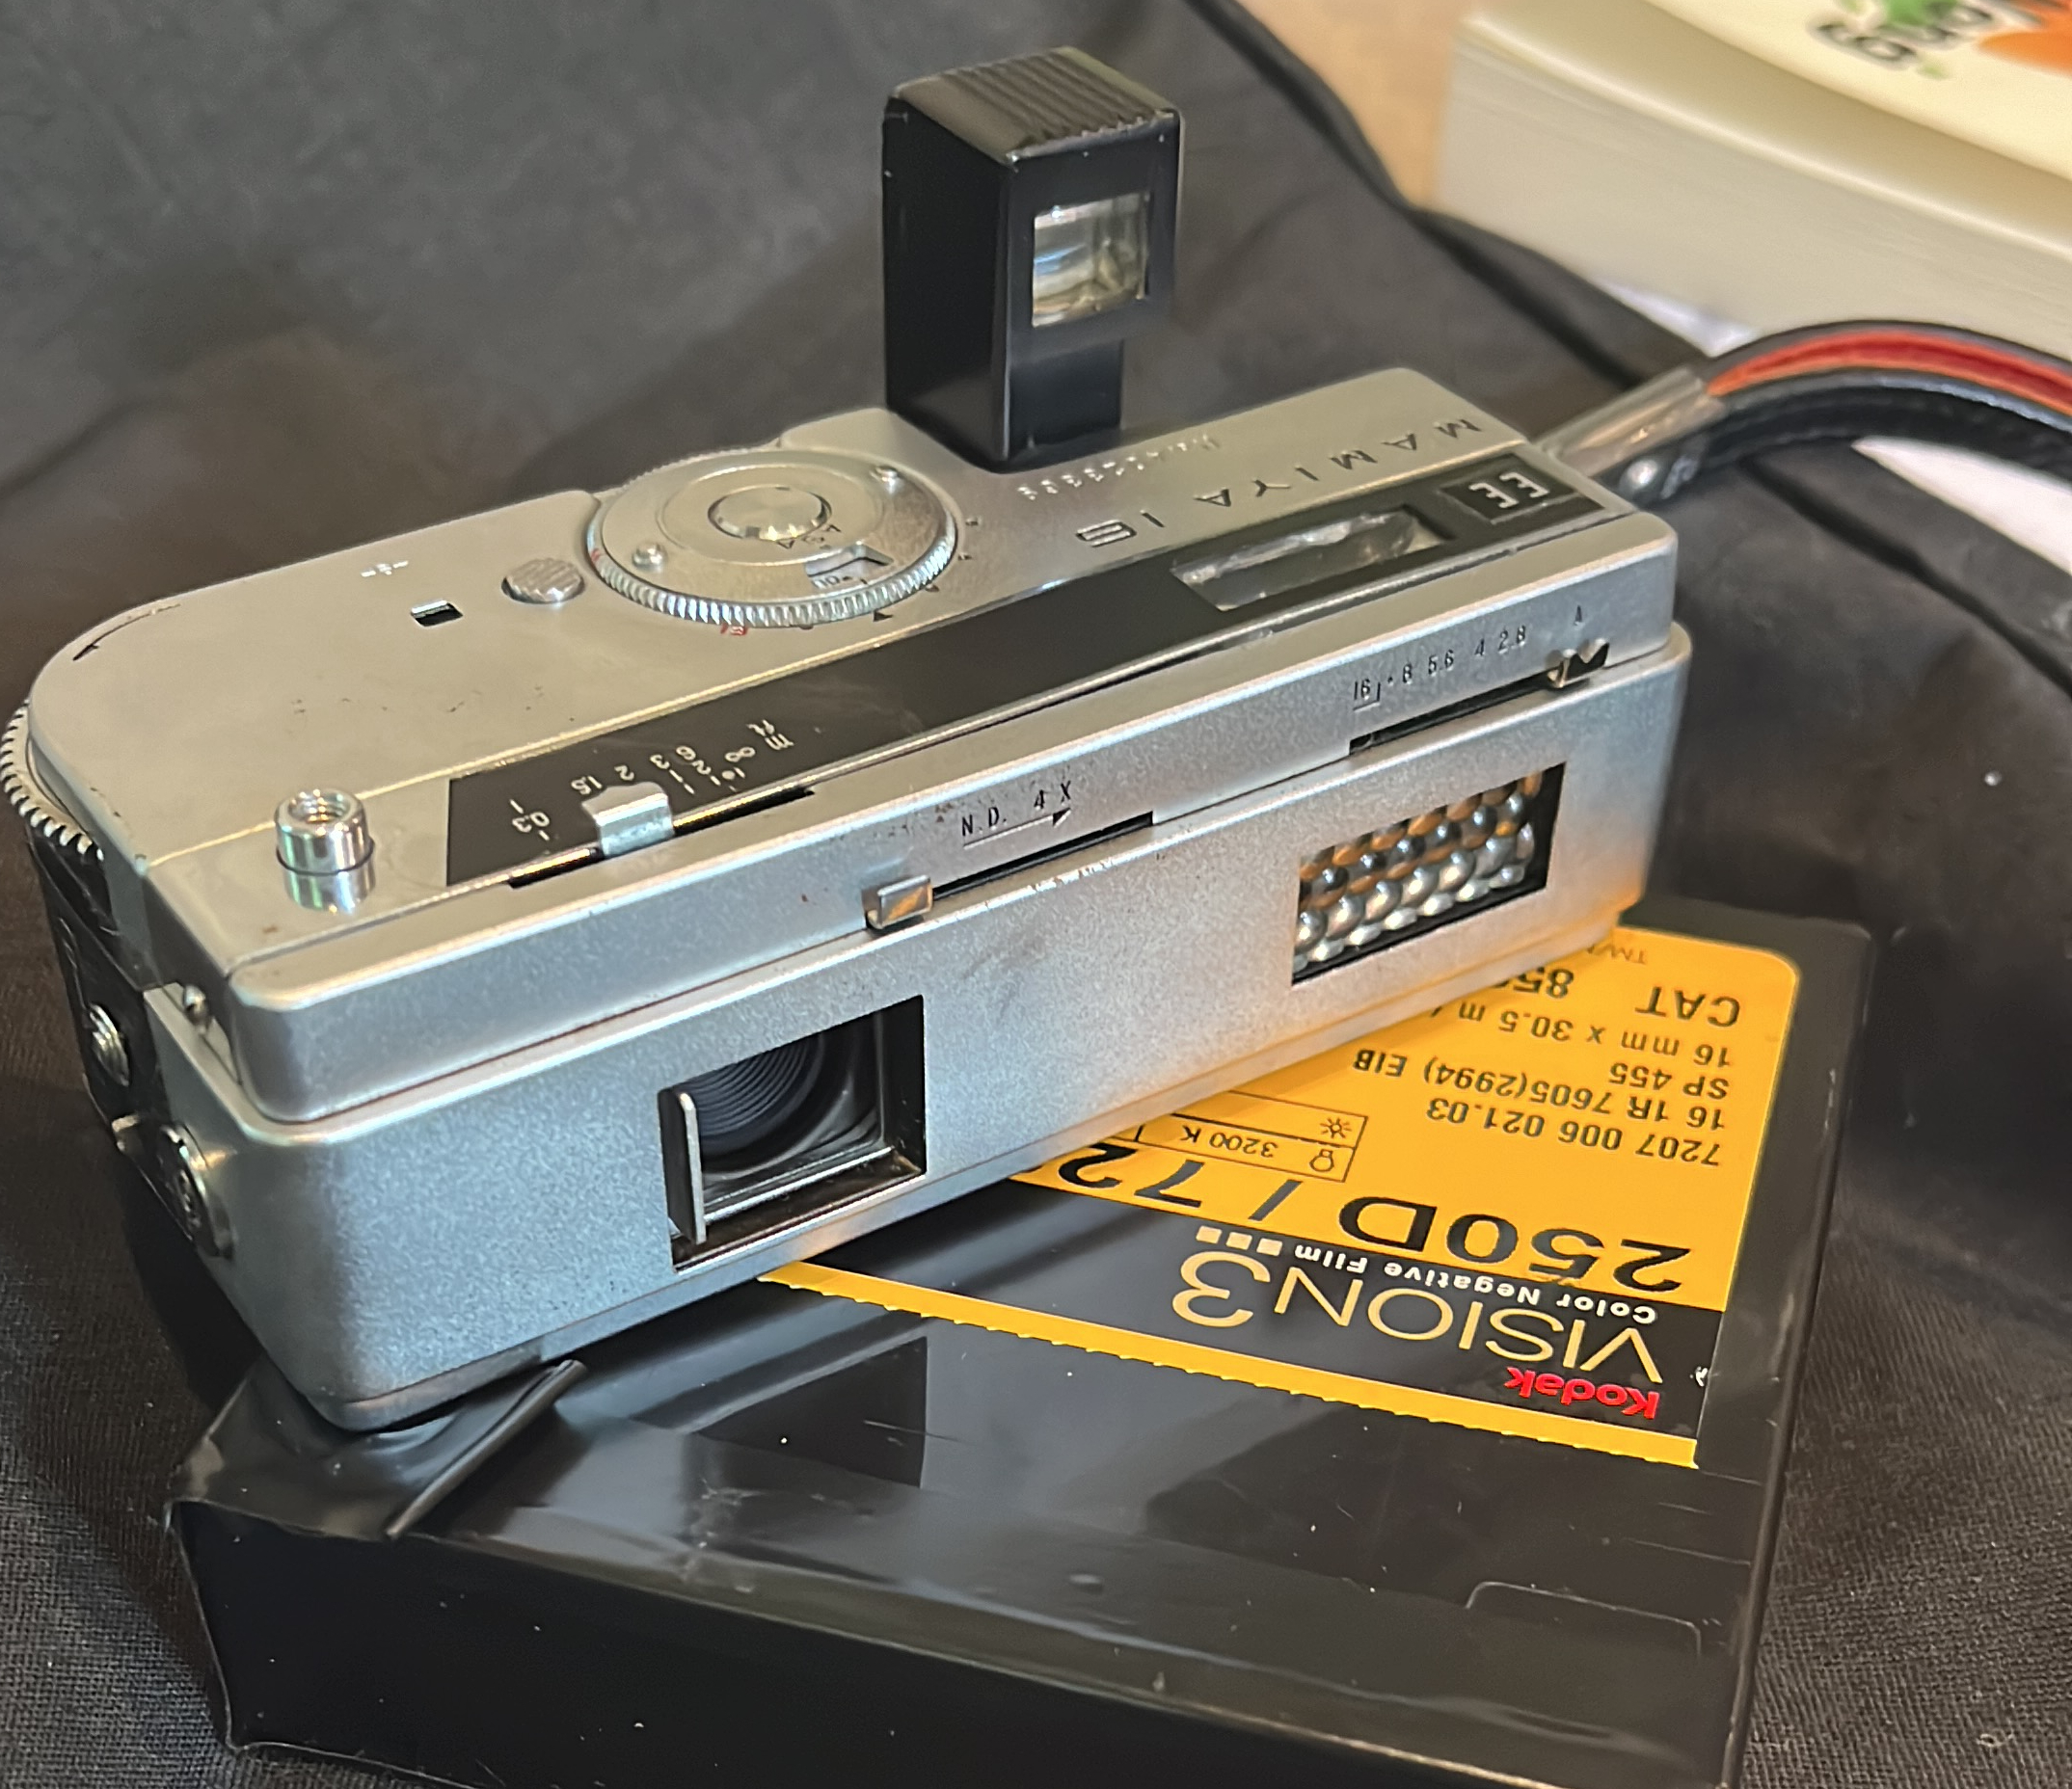
A cute lil 16mm subminiature (though it do be a bit chonky). Quirky AE system but pretty amazing to have automatic exposure control and a fast focusing lens on such a tiny lil thing from the 1962. It’s a little chubbier and some might say less sexy then the similar-but-not-actually-automatic Mamiya 16 Automatic but I’m quite fond of it and think that the strange AE mechanism is totally worth it.
Vitals:
- Aperture: f/2.8 - f/16 (4 blades AFAICT)
- Focal Length: 25mm (approximately equivalent to a 70mm lens on a 35mm full-frame camera)
- Min Focusing Distance: 1ft (this is a focusing lens, not a fixed focus like many other models)
- Negative Size 10mm x 14mm
- Shutter Speeds: 1/200, 1/100, 1/50, 1/25, 1/10, 1/5, B
- Fixed pop-up viewfinder brightline frame and parallax markings (omg it’s so cute)
- Kinda wacky automatic sort-of-shutter-priority metering via selenium cell
- Advertised as being able to meter EV 7-17 though see exposure control
- By design, can automatically meter ASA/ISO 2 - 100
- Comes with a neat ND4 (2 stops) neutral density filter built in
- fiddling with this can let you shoot 200ISO & 400ISO film automatically)
- Film counter counts up to 20 frames.
- Takes special Mamiya 16mm film cartridges
- Dimensions: 4 1/2” x 1 11/32” x 2 1/8” (114mm x 34mm x 54mm)
- Weight: 14oz (397g)
Other writeups which seem more or less accurate:
Documents:
- User Manual (also nice OCR’d version from Butkus (you really should send him some money)
- Sales Brocure
Exposure Control
This lil cutie has sort-of shutter priority automatic control, but it’s not exactly what you might expect. There is no coupling between the shutter speed and aperture mechanisms. The intent is that you set the shutter speed to a specific setting (in fact the shutter speed dial does not have shutter speeds printed on it, just the ASA that they are intended to be used with) and then the aperture just does its thing independently of the shutter.
The light meter is a selenium meter (i.e. there’s no battery), when you wind the film (which also cocks the shutter), the meter needle is allowed to move freely. When the shutter is released, a funky stepped thing clamps down on the meter needle wherever it happens to be which controls how much the aperture is closed (this is sometimes referred to as a “trapped needle” or “captured needle” mechanism, it’s common on many CdS and selenium automatics). If you watch carefully through the lens, you’ll see that the aperture gets cranked open when the shutter is cocked, and then closes down right before the shutter opens. If your particular film/shutter speed would be overexposed at f/2.8, you are advised to switch to a faster shutter speed to compensate. If your shot would be overexposed, you’re advised to use the ND filter to bring things down two stops.
Shooting on “manual control”
This camera doesn’t really have manual mode. The aperture is always coupled to the position of the meter needle. There is an aperture slider on the front, and all it does is (quite literally) push the meter needle over towards smaller apertures (the aperture control sets the largest permissible aperture, but if there’s lots of light, the camera might go smaller). This means it’s possible to use manual control of the aperture to underexpose, but not to overexpose. If you want to overexpose, you have two options: choose a slower shutter speed or cover up the meter. With the meter covered up, the needle will drop to the low end of it’s range (which would cause the aperture to go to f/2.8 in lieu of manual control) and then the manual control will always set the aperture exactly where you want it.
Shooting Fast(er) film
The meter as is (assume your selenium cell is not overly degraded as mine was) is only set up to shoot up to ASA 100 film, if you want to shoot faster than that, your options include:
- Remove the sliding shutter that partially covers the meter when the ND filter is in place. This small piece of metal can be easily removed if you take off the front cover of the camera by removing the two screws at either end. This will make the camera meter 2 stops off, so if you choose an appropriate shutter speed setting (i.e. choose the 100 setting for 400 film, or the 50 setting for 200 film) you should get reasonably accurate exposures.
- Install another ND filter over the lens. This camera doesn’t really have a spot for it, but you could slid a thin 1-or-2-stop filter in between the lens and the existing filter for a similar effect
- Go crazy and replace the selenium cell with something else! My cell wasn’t totally dead, but wouldn’t push the meter needle farther than half way over even in full sun so it was never going to meter correctly anyways. I replaced the selenium cell with a silicon cell from an old calculator and calibrated it such that it meters two stops more sensitive. I set the shutter speed dial two stops down from whatever film speed I’m shooting and have a great time. Supposedly silicon cells have a different spectral response than selenium cells and different linearity, but it seems good enough.
A note on dead/dying selenium cells
As they age, selenium photocells tend to loose potency (so I’ve read, I’m not an expert). The cells also can accumulate corrosion on the contacts that prevents them from reading correctly. Check your camera’s meter against a trusted handheld meter (use a phone app if you don’t have one). Lots of folks out there report that cleaning the contacts on their cell brought their old selenium meter back to life, so if your meter is dead or reading inaccurately, give that a try. If your meter is not dead, but is so degraded that it will not permit any accurate metering, The best thing is probably to just completely disconnect it. This will cause the meter needle to stay at 0 which will let you manually select apertures with confidence when you shoot. To get at the meter, remove the front silver cover by taking out the two screws on either end and carefully sliding it off, then remove the two forward-facing screws that hold on the black front plate which carries the meter cell and ND filter. You’ll see two wires connected to the meter cell with small screws that you can disconnect and tape over to turn your EE into a manual machine.
Film & Cartridges:
The 10x14mm negative size accommodates single, double, or unperforated 16mm film (unlike some other 16mm cameras with larger negative sizes or film transport/counting mechanisms that depend on the perforations). You can slit this yourself from 35mm or 120 film, but it’s easiest and cheapest to just buy a big ole roll of 16mm movie film and load it yourself.
The cartridge:
- These came apparently in single and double sided varieties (the single sided ones are kinda like a tiny 35mm film can, the double sided ones have two lightproof-ish cans connected by a thin bridge, similar to minolta 16mm and minox cartridges).
- You can find em on the internet but they are pricey
- They are easily hand-reloaded with 16mm film (you can build/print/buy a slitter that will cut this from 120 or 35, or better yet buy a roll of 16mm movie film)
- You can 3d-print these cartridges:
- mamiya_sprued.stl This file has all 4 parts (the housing, the two caps, the spool) sprued together so you can have a 3d printer online somewhere print it as a single part (they usually have a minimum cost/part and then charge by volume after that). This is a remix of philpem’s design on thingverse
- Your 3d prints might not be lightproof depending on what medium you print them in (a lot of filaments and resins, even if black, aren’t opaque enough)
Develop & Scan:
If you develop yourself, you’ll need to get your hands on a 16mm developing tank/reel. These can be bought on eBay and elsewhere, but much cheaper to get them printed. I used this design for a nikkor tank (comes in two different stl files that get snapped together). michaelfowler also has minox and 17.5mm reels as well. If you have a jobo or patterson style tank designs are out there for those as well (look for “110” or “16mm” reels - 110 film is about 16mm and the reels are interchangeable).
For scanning, I use this kinochrome 110 film holder with a dslr scanning arrangement, although you could certainly just cut a hole in some mat board and have a great time. There are lots of designs for 110 film holders that will work just fine with 16mm film for flatbed and dedicated film scanners too if that’s your vibe. (get one without frame separators cause your frames are going to be smaller than 110 frames)
A Word On 3D Printing
I don’t own a 3d printer, I’m not really into 3d printing per se, and if you’re not either, don’t let that stop you! Lots of libraries have 3d printers and will help you get it set up and often print for close to free. I order my parts from jlcpcb.com who are cheap and I’ve had good experience with, but there are tons of 3d printers out there.
